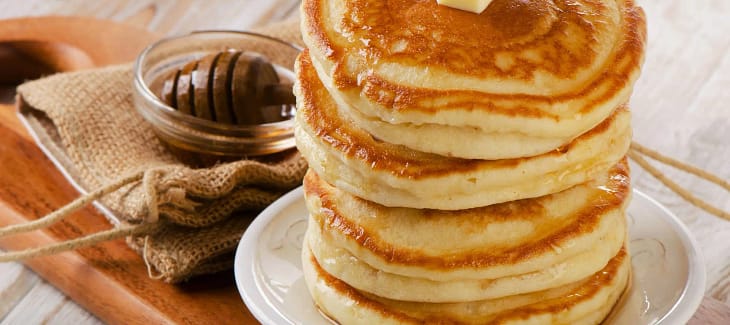
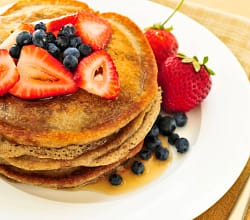
Pancakes are my most comfortable and satisfying breakfast food. They work well as a filling breakfast food or as a versatile snack, topped with whipped cream, strawberries, and more. Recently, gluten free pancakes started catching my eye because they seem to be healthier than normal pancakes. Or at least, that’s what the general consensus says. Since every pancake mix you see at the store contains gluten from wheat, I decided to experiment with gluten-free flours and nut-based flours.
As it turns out, going gluten-free on your pancakes can actually be helpful for you, depending on your body’s overall sensitivity to gluten. Even if you have no allergic responses to gluten, some gluten-free flours have additional vitamins and minerals that regular flours don’t have. Almond flour is the most popular alternative flour and is the easiest nut flour to use.
There is a challenge, however, in making sure that the flour binds to your liquid while making the batter. Gluten is a natural binding agent, holding ingredients together during cooking to give foods their shape. This is why breads, cookies, and pancakes hold their shape so well once they are ready to eat. Every gluten-free flour, including nut flours, have a unique flour-to-water ratio, so it is important that you follow the recipe guidelines for each individual flour base.
It is important to note that all nut-based flours, such as almond flour, oat flour, and walnut flour, do not contain any gluten.

What is gluten, and is it bad for you?
Gluten is a natural protein found in the wheat plant. As such, gluten will always be inside wheat foods such as bread and pizza, unless it is manually extracted through a mechanical process known as centrifugation. Gluten is not water-soluble, so this quality allows it to separate from its wheat constituents.
The human stomach cannot break down gluten completely during digestion. So, the undigested gluten ends up passing through the small intestine. For most of us, this process is normal, and we don’t feel any complications. However, some people have either a high sensitivity to gluten or an autoimmune response to gluten known as celiac disease. For this small sector of the population, gluten causes extremely unpleasant symptoms or worse, damaging the lining of the small intestine. For them, gluten-free eating is an absolute must.
According to research, it turns out there is no nutritional difference between eating gluten or staying gluten-free. Processed gluten-free foods such as crackers and potato chips are often the real culprit of health concerns around gluten, since they contain lots of additives, especially in the US. So it’s not specifically the gluten that causes bloating, heart disease, and cancers, but rather the processed foods that artificially remove the gluten during the manufacturing process. Gluten free pancakes are extremely unlikely to differ from regular pancakes, especially if you choose to make your batter from scratch (the smart thing to do!).
Why choose gluten free pancakes over regular pancakes?
Eating gluten free pancakes is a must if you suffer from any gluten-based complications. Gluten-free all-purpose flours are available in almost every grocery store and are quite cheap. Finding them at the grocery store or online should not be an issue.
My favorite gluten-free flours, however, are the nut flours. Blanched from ground nuts, these flours retain all the essential nutrients that their nut bases originally had. So not only are you able to enjoy nuttier pancakes, but you also get all of the health benefits of eating nuts like almonds and pecans. This is the main reason you should choose gluten free pancakes over regular pancakes-you get to eat pancakes that are richer in flavor and boast more nutrients thanks to their nut bases.
Be advised, however, that making nut batters from scratch may be difficult at first. You have to be careful that your pancakes don’t end up crumbly or falling apart after cooking. Remember that gluten is a natural binding agent in wheat, so not having this protein to help your batter process can make your pancakes unable to coagulate into a thick solid, which is a problem. To solve this issue, you must use creative alternative binding agents such as eggs, ground flax seeds, or applesauce.
What you need to make gluten free pancakes from scratch
Making gluten free pancakes is almost identical to normal pancakes. The specific variations between different recipes depends on what flour base and binding agents you use, and how much of them you put in your batter. Eggs, flax eggs, mashed bananas, and applesauce tend to be the most common binders in gluten-free recipes.
For this recipe, we will be using Bob’s Red Mill 1 to 1 Gluten Free Baking Flour as our primary choice, although this recipe can and will work with any other gluten-free flour. Nut flours tend to have very specific ratios of flour to water depending on your serving sizes, so it’s best to follow those guidelines. Almond flour, for example, needs slightly more flour than water. Your batter should be thick, but not so thick that it’s difficult to stir.
Ingredients
- Gluten-free all-purpose flour. Your flour should be designed for 1 to 1 baking. This means you can mix equal parts flour and water and still have a great finished product. Experiment with different flour amounts so that you find the best batter consistency. If your batter is too runny, simply add a bit more flour. Or just follow the serving size amount in this recipe.
- Buttermilk. Choosing water or milk as your primary liquid is up to you. Personally, I like to ditch water in favor of buttermilk, which gives the pancakes a beautiful rich flavor. If you cook your pancakes with butter, it makes them even tastier. Other liquids you can use include cow’s milk, skim milk, Greek yogurt, half-and-half, and plant-based milks like oat milk and coconut milk.
- Binding agent (Eggs). Eggs are the most reliable binding agent. They contain almost all essential amino acids and have a very thick consistency. They are responsible for maintaining the consistency of your batter so that it’s not too thick or runny. Flax eggs are viable alternatives for vegans-they are made out of ground flax seeds which are also very viscous.
- Baking powder. Another non-negotiable, baking powder helps gluten free pancakes become fluffy and airy. It helps them cook more easily on low heat as well. Baking soda is a decent replacement if you don’t have baking powder-there isn’t much difference between the two.
- Baking soda. Baking soda is only required if you are using buttermilk or other acidic milks. Baking soda is an agent that not only helps gluten free pancakes rise, but also balances the ph of your batter. If you are using water for your batter liquid, simply replace baking soda with additional baking powder.
- A pinch of salt to balance out the taste.
- Vanilla extract. This gives some extra vanilla flavor while not being too overbearing.
- A fat source for pan-frying. Butter is the best option for high-quality pancakes, but margarine, non-stick cooking sprays, and oils work great too. Keep in mind that you will need some butter to be mixed in the batter as well.
- Granulated sugar (optional). Just a little bit can make the taste sweeter, if you want that. Personally, I don’t go for it because the buttermilk makes the pancakes richer, and I can just add powdered sugar on top of the finished pancakes anyway.
*IMPORTANT NOTE*-if you plan on using nut flours, do your own research on how much liquid and flour you need to achieve the correct viscosity. If you don’t, your pancakes may end up crumbly or they may even fall apart once cooked!
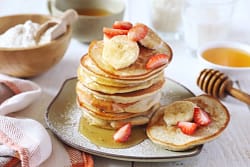
Basic Gluten-Free Pancakes
Equipment
- 2 large mixing bowls
- 1 whisk
- 1 spatula
Ingredients
- 1 cup gluten-free AP flour/nut flour
- 1 cup buttermilk
- 2 large eggs
- 1 tsp aluminum-free baking powder for batter rising
- 1 tsp baking soda for ph balancing
- 2 tbsp melted butter/margarine
- 2 tbsp granulated sugar
- ½ tsp kosher salt
- 2 tsp vanilla extract for flavor, optional
- chocolate chips for mixing optional
Instructions
- Gather 2 mixing bowls and a whisk. Both bowls need to be large enough to mix your ingredients in.
- In one bowl, add gluten-free flour, sugar, baking powder, baking soda, and salt. Whisk to combine.
- In the second bowl, add buttermilk, eggs, melted butter, and vanilla extract. Whisk to combine. (Melt the butter in a small ceramic dish before mixing it in.)
- Pour the wet ingredients into the bowl with the dry ingredients. Whisk everything together until you have a nice, creamy batter that is neither too thick nor too runny. Set it aside for 5-10 minutes to let the baking powder activate.
- While you are waiting, preheat a metal or cast iron skillet over medium-low heat. Once ready, spray your pan with nonstick cooking spray or coat it in butter.
- Pour your batter into the pan until it reaches your desired size. Add fillings like chocolate chips at this point, before the pancake has a chance to harden.
- Let it cook until the sides and bottom are golden-brown, then flip it with a spatula. After the other side of the pancake finishes cooking, set it aside on a dish.
- Repeat steps 5-7 until the batter is finished. To enhance the flavor of the pancakes, try adding toppings like maple syrup and powdered sugar. Enjoy!
How to store gluten free pancakes
Depending on how many pancakes you have or how big they are, you may need a large container. Or, you can keep pancakes on a dish and cover the dish completely in plastic wrap. This slows microbe buildup and keeps the food fresh. If you use containers, seal them tightly and place them in the fridge. Pancakes will stay fresh up to a week this way.
For freezer storage, wrap your pancakes in aluminum foil or use an airtight freezer-safe container. Freezing pancakes will keep them fresh for around 3-4 weeks.

